I'd seen many people on the Internet doing this awesome art project, so I thought I'd give it a go. It only cost me £1 altogether because the only thing I needed was the canvas! I found the crayons in the spare room when tidying up in there, I borrowed the hot glue gun from my nan and I already had the rest of the materials.
All the stuff you need:
- Plain white canvas
- A spectrum of crayons
- Hot glue gun (with extra glue sticks)
- Hairdryer
- Cardboard (from an Amazon box or something similar)
- Pencil, rubber and black fine liner
- Sheet of white paper or card
- Scalpel/craft knife
- Glue stick (Pritt stick)
What to do:
 |
| 1. Remove the wrappers from the crayons. You can use the scalpel to cut down the sides of the crayons if the wrappers are too difficult to remove by hand. |
 |
| 2. Organise them into the order that you want. I would recommend not putting the crayons exactly in colour order because then there would be a big block of the same colour, and it's nicer to have a bit of variation while still keeping the general rainbow effect. |
 |
3. Plug in your hot glue gun and put a line of glue where you want your first crayon to go. Stick down your first crayon but remember to be quick as the glue dries quite quickly! But once it's dry, it is very difficult to move or remove. Continue this for all the crayons. |
 |
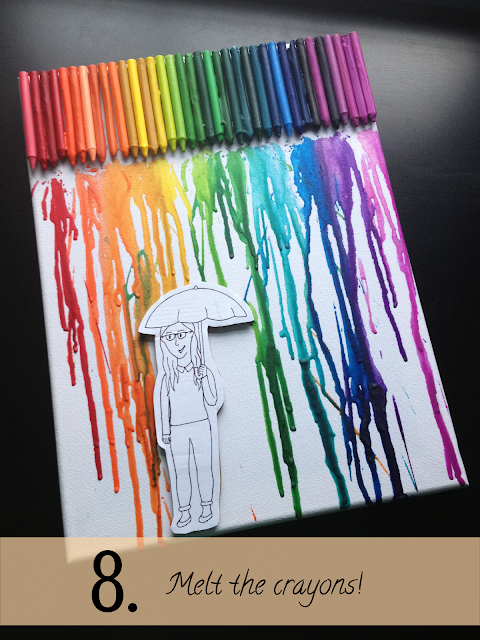
4. With a pencil, sketch out the design that you want at the bottom of your canvas on your piece of paper or card. The classic thing to draw is someone holding an umbrella because when the wax melts, the majority of your design is shielded, and it just looks pretty!
 |
| 5. Once you are happy with your design, go over the pencil lines with a black fine liner and cut out the design. |

|
| 6. Cut out a couple of pieces of cardboard in the same shape as your design, stick them together and then stick your design on top using a glue stick or Pritt stick. The more layers of cardboard you use, the more your design will stick out and therefore the less chance that the wax, when you melt it, will drip onto your design. |
|
|
7. Stick it all onto the canvas.
8. Switch your hairdryer onto the highest heat and power settings and get melting those crayons!
|
|
|


No comments:
Post a Comment